Groundbreaking, and mark-making
Posted by Lanea on Monday, March 7th, 2005

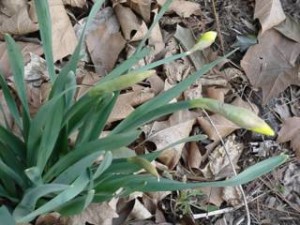
Sure, I’m knitting. But look at what the green things are doing.

Virginia has been approaching spring for some time. Today she got serious. Today, it almost reached 70 degrees Fahrenheit. That’s warm. That’s gardening season. Flowers are doing their best to break out all over. I have mini iris, daffodils, croci, and snowdrops popping up all over. My frenzied bulb-planting is paying off in spades.

I love that these daffodils look as if they’re submerged and reacting to tides.
But tomorrow snow is forecast. I’ll try to focus on the needles then. And soon, I will only knit when it’s dark outside..
I’ve gotten a few requests in the comments to show folks how to make beaded stitch markers like those I showed a while back. So here’s a brief how-to. I don’t have any photos with which to illustrate–sorry. I’ll try to add some later. Oh, and my Mom the nurse educator wants me to say "If you have little kids, don’t use stitch markers like these–use loops of yarn until the kids are older and better able to fully swallow the things you value, rather than choking on them."
This project will require a trip to the bead store if you don’t already have a well-stocked beading kit. Decide how many markers you want to make and buy your supplies accordingly. I made tons. If you get confused in the bead shop, ask questions. If your questions confuse the employees, tell them you’re making things much like drop earrings. If you don’t have a bead shop near by, go here. While you’re there, um, would you mind picking some stuff up for me ? . . .
You’ll need these supplies and tools:
* Needle-nosed pliers
* Wire cutters
* Head-pins–I’d recommend pins at least 1 and 1/2 inches long with ball tips
* Split rings–in a size that is a bit bigger than the needles you’ll be using the markers on (remember that rings are sized by their outer diameter–not inner, so buy carefully) I almost always use 8 mm. You can use jump rings, which come in larger sizes, but they are more bratty once completed because they can snag yarn or the drop can fall off the marker.
* Purty beads: I used both small silver beads for flash and spacing (and to keep larger beads from falling off the head pins) and larger glass and metal beads (aka stations in bead-speak)
* Finally, a beading tray or surface is nice to have. You don’t have to buy a special tray, you can just lay out a hand towel on which to work. Beads like to roll about, see, and if you make it hard for them to roll about, your project will be easier to complete.
You’ll need one head-pin per marker plus a few extra in case you break some, a split ring per marker, a station (major bead) per marker, and some little beads for embellishments if you’re into that (or if your stations’ holes are too big to stay on the head pin). I find markers most useful if the set has at least one marker that is in some way distinguishable from the others. You’ll notice in my new sets that I have four small raku beads and two large ones, or two frogs and two glass baubles. Since markers are a useful tool, you should make markers that will please your mind as well as your eyes.
Now comes the making o’ the markers
1. Sit down at a table.
2. Lay out a towel or put your beading tray in front of you.
3. Arrange your beads. Do you love them? If you don’t love them, why are you doing this?
4. Now (I can’t believe I’m acting like this is a skill) pick up a head pin.
5. Thread a bead onto it. Do you like it? If you want to, add some small beads on either side of the big bead. How’s it lookin?
6. Ok, with the beads all the way down on the pin, pick a little less than a centimeter above the beads and, using your needle-nosed pliers, bend the pin.
7. Slide the split ring up into the crook of the bend you just made, and then fold the end of the head pin all the way over. You should have a little drop with the ring at the top, from which hangs the pin, on which are threaded the bead(s).
8. Now wrap the free end of the head-pin around in a spiral as many times as you can, using either your fingers or your pliers.
9. Once it’s wrapped up tight, adjust as necessary. If you have any little scary bits of wire poking out, threatening you or your yarn, squish ’em with your pliers and/or cut them off with your wire cutters.
10. Notice how much what you just made looks like an earring, but with a ring instead of a hook at the top. Open jewelry booth at local craft fair.
11. Repeat until all of your supplies are used up, or until you decide you hate beading, or that you love beading and will forsake all other hobbies for it.
Filed in knitting | No responses yet