Sock Bag Tutorial: Part One
Posted by Lanea on Sunday, December 2nd, 2007
Edited to add: In case there’s any question, I posted this tutorial in the spirit of generosity. It is copyrighted material, however, and thus no one is permitted to reproduce the pattern or the bags made from the pattern for profit without my express permission. Sorry if that seems brusque–just trying to protect my intellectual property.
You ask, so I give.
A few people asked for a tutorial on making these sock bags I’ve been churning out, so here you go. I’ve also set up an etsy shop to sell a few, so if you want one and really hate sewing, check it out. Also, this is a very picture-heavy post, so I apologize to anyone with a slow connection. I am breaking the tutorial up into two posts so I don’t sink you all completely.
I make each bag out of small amounts of two cotton quilting fabrics, some cotton twill or denim, and a foot of leather thong. I use scraps, because I have tons of them. If you need to buy fabrics, two fat quarters* will be plenty for the exposed parts of the bag. For the denim or twill, you only need a very small amount–one or two 6″ square pieces, depending on the thickness of the twill. So buy a small remnant, no
matter how ugly; pester a friend who sews for some scraps; or chop up those trashed, holey jeans your mother doesn’t want you to wear anymore.
Supplies:
two fat quarters of quilting cottons in coordinating colors and prints
matching thread (one spool to match each quilting fabric)
Enough cotton twill to make one or two six inch squares
12 inches of coordinating leather thong or ribbon
Tools:
a self-healing mat (optional)
a rotary cutter with a sharp blade (optional)
shears
a six inch square (optional)
a straight edged ruler
an iron
pins
sewing machine (optional) or sewing needles
Let’s go.
Wash, dry, and press your fabrics. I run a quick zig-zag stitch over the edges of fabric before washing it so it doesn’t fray too much in the machine and make a mess while washing. It saves fabric and washing machine repairs.
Now let’s start cutting.
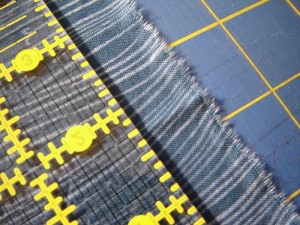
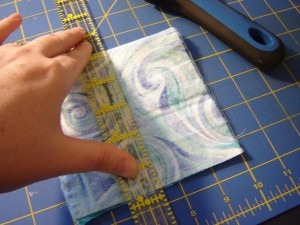
See that fraying? If the folks at the fabric store tore the fabric rather than cutting it, you’ll find that the edges are a bit tattered and pulled off grain. For a bag like this, that won’t be a huge problem, but I trim them off with the rotary cutter out of habit because it makes for better patchwork. Geometric things are easier to assemble and sew if the edges are clean.
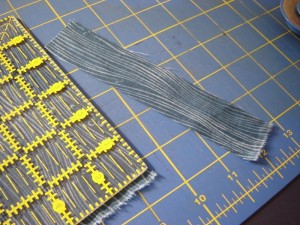
Also, I look seriously at scraps. Anything below a certain size gets composted, and anything above a certain size goes back into the stash. This piece wants to be part of a log cabin.
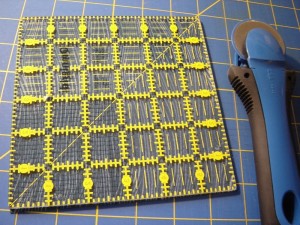
Cut five six inch square pieces out of each of your quilting cottons–those make up the box that is the body of the bag.
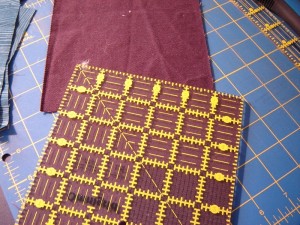
And cut one or two six inch squares of twill, depending on how sturdy you want the base of the bag to be. I want mine to be burly, so I’m using two.
Now cut the strips for the handles. You need one that’s two and 1/2 inches wide and 10-12 inches long (your choice) in each fabric, and one that’s two and 1/2 inches wide and six to eight inches long in each fabric–that’s a total of four two and 1/2 inch wide strips, two long and two short.
Now we start assembling.
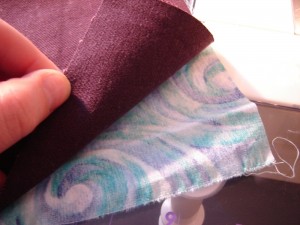
Line up a piece of twill to one of the squares of quilting cotton. In this instance, you want the front of the quilting cotton facing out–this is unusual.
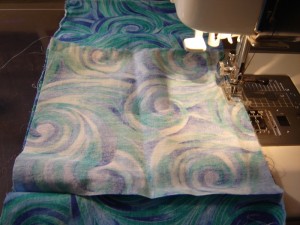
Now sew them together all the way around
with a straight stitch, leaving a narrow seam allowance.
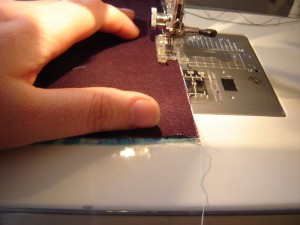
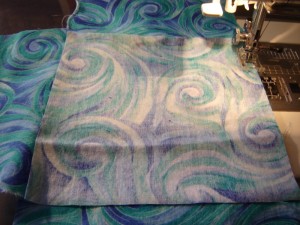
You’ve just added a reinforcing lining to the bottom of the bag. Now flip it over, line up a square of the same quilting cotton on top of the base, with the right sides of the print facing each other, and sew them together along one side.
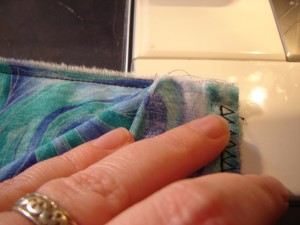
A few things: first, I’m using a dark thread so you can see what I’m doing. You should match your thread to your fabrics. Second, see how I didn’t start the line of stitching right at the corner? That’s important. You want to start and stop your stitching a bit in from the edges to you can sew all four sides together neatly. Third: I’m using a combined straight and zigzag because I am very paranoid about fraying. You can do the same if you like, but you don’t necessarily have to unless you decide to use linen instead of cotton. Linen must have all of the edges over locked or bound or it will fray away to nothing and break your little heart. Ask me how I know.
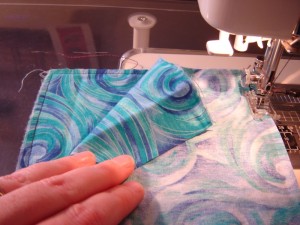
Sew on the other three sides in the same way.
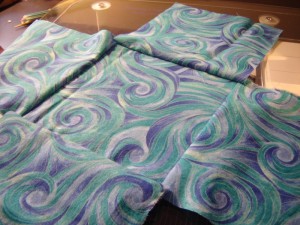
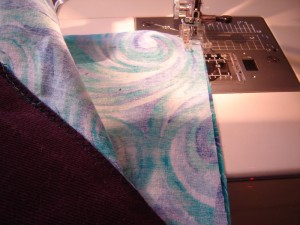
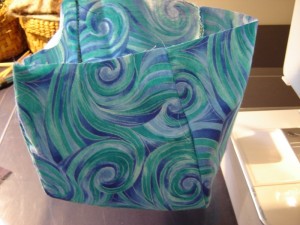
And now sew the four sides together at the corners, and turn it right side out.
There’s the first box of two.
Now do it again with the other quilting cotton.
Part two of the tutorial is here.
* A fat quarter is a chunk of fabric marketed to quilters. To make a fat quarter, someone will cut a half yard of fabric and then split it vertically instead of horizontally–hence a fat quarter, as opposed to a skinny quarter, cut from selvage to selvage. The size of a fat quarter varies from shop to shop, but most are either 18′ to 20″ high and 21″ wide.
Filed in knitting,sewing | 14 responses so far

Melissaon 05 Dec 2007 at 10:13 am 1Oh, how I wish, wish, wish the fabric store employees would rip instead of cutting my fabric. Years ago, it was commonplace. Recently I got a look like I was a Martian when I demanded they rip my cotton fabric. Nothing is ever on the grain.
Love your tutorial!

Melissaon 05 Dec 2007 at 10:14 am 2Oh, how I wish, wish, wish the fabric store employees would rip instead of cutting my fabric. Years ago, it was commonplace. Recently I got a look like I was a Martian when I demanded they rip my cotton fabric. Nothing is ever on the grain.
Love your tutorial!

Jinannon 07 Dec 2007 at 11:14 pm 3Thanks! In my “spare time” I may one of these – thanks so much for sharing your technique with all of us…that was very generous of you!

sally M Cutneron 13 Mar 2008 at 10:44 am 4Love your blog and the sock bag.
I am 65, but internally I am 14-17 yrs old, soooooo when I read how you admitted to being an “unstructured” person, I cheered with much glee, because for the first time in my life I was “hearing” someone saying out loud the truth of myself and it was like, Ok, that is, has and will always be me. Freedom. Probably doesn’t sound like a big thing to you, but to go through life thinking that I reallly should be like her, or her, or her, and not be so enthusiastic about this new art form and this new craft or quilting or painting, but i should just “be” (boring, boring boring).
OK, world sometimes I am ADD (attention deficit……….), not a disorder, to match it I do have an IQ that won’t allow me to be complacent about whatever it is that I am pursuing.
Free at last, free at last. I shared this with my 44 yr old daughter and she laughed and smiled in agreement (over IChat)
I am unstructured and I love it, I am out of the closet with my interest. Most interests have traveled many years with me, like oil painting and china painting (old tea sets and platters a pitchers, etc. like great grandma had), sewing, even though my stain glass was a very expensive fling (as it turns out)………….sigh
YOU MY DEAR ARE WONDERFUL……CLOG ON
stamina4uandme at Ravelry.com

Teresa Fon 14 Apr 2008 at 11:31 pm 5Saw your bag on Ravelry (I just got my invite a few days ago…yay!) and wanted to see the instructions. I have to say that I don’t find your comment about intellectual property brusque at all! I am impressed that you are willing to share the pattern when you also sell the bags…way to share!!
Teresa F

Teresa Fon 14 Apr 2008 at 11:33 pm 6Saw your bag on Ravelry (I just got my invite a few days ago…yay!) and wanted to see the instructions. I have to say that I don’t find your comment about intellectual property brusque at all! I am impressed that you are willing to share the pattern when you also sell the bags…way to share!!
Teresa F

PattyAnneon 15 Apr 2008 at 7:11 pm 7I love the bag. Thanks so much for the tutorial. You can see my bag here!
PattyAnne
http://pattyannesplace.blogspot.com/

FibroKnitson 04 Sep 2008 at 10:47 pm 8Thanks for such a neat bag, and for being so generous in sharing it. I just made one for myself; you can see it on my blog if you wish.

FibroKnitson 04 Sep 2008 at 10:49 pm 9Sorry, my blog is at < "http://fibroknits.blogspot.com">http://fibroknits.blogspot.com.

Kylieon 05 Oct 2008 at 8:36 am 10Thanks so much for the free pattern
I have just finished and blogged mine. And am about to pop it on my Rav page as well.
Thankyou again.

octopuson 03 Feb 2009 at 9:28 am 11Thank you very much for sharing this pattern!
I’ve tried it, and although I’m a beginner in sewing it was very clear for me.
a picture can be seen on my blog:
http://octopus.myblog.de/octopus/art/298439312/Socks-Bag
BR
octopus

octopuson 03 Feb 2009 at 9:32 am 12Thank you very much for sharing this pattern!
I’ve tried it, and although I’m a beginner in sewing it was very clear for me.
a picture can be seen on my blog:
http://octopus.myblog.de/octopus/art/298439312/Socks-Bag
BR
octopus

Louiseon 25 Nov 2009 at 6:07 pm 13Hi Amy,
I finally found your tutorials. Thanks for the “heads up”.
I’m looking forward to trying to make my own. I’m sure I even have appropriate fabric.
Thanks for your generousity. I really wanted to buy one of yours at the KRR, but, lucky you, they were all sold!
They are fabulous little bags for small projects………socks, of course! I will love using it.
As I said, I’m glad to have gotten to know you better this year at KRR. I’ll miss all the chatter, and laughter. I’m already looking forward to next year.
Take care, and Happy Thanksgiving,
Louise

Finish Along Projects – Second Quarter 2012 « kandaraeon 19 Apr 2012 at 11:25 pm 14[…] Project Bag #1: Started January 2012. Pattern is from Crazy Lanea. All the pieces are cut and some sewing […]